


Small chipset fans are one of the less glamorous failure points on older motherboards. They tend to be difficult to replace, once the original fan fails, because the mounting design has become obsolete.
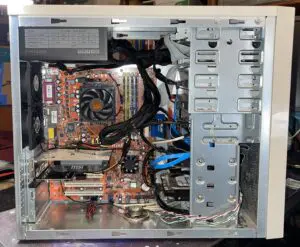
The Foxconn WinFast NF4SK8AA-8EKRS is a good example of this. The Foxconn WinFast AMD Socket 939 based board uses an NVIDIA nForce4 SLI chipset with active cooling. Contemporary reviews noted that the chipset heatsink and fan ran hot and that the assembly used a standard 3-pin connection, making replacement possible.
The problem is that “possible to replace” and “easy to replace” are two different things.
The Problem
The original fan assembly uses a fan that inserts into a circular chamber in the heatsink that doesn’t work with readily available replacement fans.
A replacement fan was available, but its mounting dimensions were approximately 4 mm off from the original, just enough to prevent the screws from lining up with the fins of the aluminum heatsink.
Drilling the heatsink would have been possible, but unnecessary and a lot of extra work. The original plastic fan frame was still available after snipping out the failed fan and that provided a solution.
Keep the Original Mounting Frame
Rather than trying to make the replacement fan fit the heatsink, the original mounting interface was preserved.
The failed fan was cut from its plastic frame, leaving the frame itself intact. This retained the original screw locations, heatsink alignment frame, and allowed the entire assembly to continue mounting to the heatsink exactly as it had before.
The replacement fan has a standard squared housing, and could sit on top of the heatsink if the screw holes had aligned properly. It was that combination which made the old frame an effective adapter.
The Eight-Point Arrangement
The replacement fan is positioned over the original frame at an angle rather than trying to align the two square housings.
The result is an eight-point overlap around the perimeter—essentially a square sitting diagonally on another square.
This provides enough contact area to secure the replacement fan while leaving the original mounting hardware accessible.
The important geometry is:
- Original frame: retains the motherboard/heatsink mounting pattern.
- Replacement fan: provides the actual cooling.
- Circular lower hub: fits into the existing recessed area.
- Offset square housings: create the necessary clearance.
- Epoxy: bonds the two pieces together without modifying the heatsink.
The result is that there is no need to make the replacement fan’s screw holes match the heatsink as the original frame already does that job.
Securing the Replacement Fan
Five-minute, high-strength two-part epoxy is sufficient for bonding the two parts. The fan is lightweight, and the original fan frame attaches to the new fan.
After testing the new fan, the bonding surfaces should be lightly roughened and cleaned before applying the epoxy. There is no advantage to filling the entire perimeter with adhesive; several solid bonding points provide plenty of strength and make a future fan replacement less difficult.
The Finished Repair
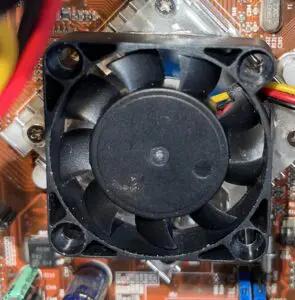
The finished assembly preserves the original mounting system while accommodating a readily available replacement fan.
No new holes were drilled in the heatsink. No motherboard modifications were required. The original frame continues to locate and mount the cooler, while the replacement fan provides the airflow.
For obsolete hardware, this is often the better approach: don’t replace the part you can’t reproduce—reuse the part that already solves the difficult mounting problem and adapt the replacement to it.